SEEBURG jukeboxes.
Seeburg M100C - all 45RPM Seeburg Jukeboxes use a similar bolt and frame securing method. This securing of the mechanism is recommended if transporting a long distance, if only going a short distance (a few hundred miles on smooth roads) then simply secure the mechanism frame as noted further down.
Ron Rich offered the following advice:
All B,C,'s used 2.5 inch, long, tie down bolts. They became the 4.5 inch bolts with the model G-W or, R, and stayed that way to the
SMC models. The R's on up, must be inserted thru the mech shelf, from the rear of the cabinet. (later models --thru the cashbox area) If using "nuts" to "stop" the bolt, it is impossible to get the shipping bolts thru the cabinet floor. (unless you grind them small enough - JR)
And further point by Ron R on securing the mechanism frame:
Also, it was strongly suggested that the three (or four, on later castings) 9/16 nuts, NOT be tightened down without 1/8 inch wooden, or cardboard shims, being inserted under the rails. The springs that the mech sits on, never should be compressed that far down, as it ruins them ! Your suggestion won't work on the phono I need the bolts for, as the double nut stops won't fit thru the small holes provided on the mech shelf-- I suggest that the 3, 9/16 nuts NOT be tightened down, if the two thumb screws are not inserted--IMHO it is better that the mech be on springs, to absorb some of the shock --Be sure when transporting that the carriage sits on the end that has the bolt holes in it, as it has been re--enforced, hopefully to prevent bending. (Thanks!)
Quoting from the Seeburg manual - PREPARING PHONOGRAPH/INSTRUMENT FOR MOVING:
M100C:
1) Place protective tube over pickup cartridge and install Pickup Arm shipping support (? - need picture!)
2) Remove all records from the magazine. Position carriage on base so that the selection indicator light is between A-5 and A-7. Put three pads under the carriage wheels, then bolt the carriage to the base by means of two 2-inch long thumb screws.
3) Put two wood 1/4 inch shims under the base at the mechanism hold-down bolts.
4) Tighten three mechanism hold-down nuts.
U100:
1) Tighten the four mechanism hold-down bolts
Note: On some phonographs it is necessary to putshims under the mechanism base at the hold-down bolts before tightening.
2) Remove all records from the magazine.
3) With the pickup arm in the left hand side kaying position, scan the mechanism to a point at selection A1.
4) Place two fiber pads (long pad in rear, short one in front) under the carriage wheels and bolt the carriage to the base by means of two 4-1/2 nch long thumb screws, which are to be inserted through the mechanism base.
SE100:
1) Put shims under the base at the mechanism hold-down bolts.
2) Tighten the four mechanism hold-down bolts
3) Remove all records from the magazine.
4) With the pickup arm in the left hand side kaying position, scan the mechanism to a point at selection A1.
5) Place two fiber pads (long pad in rear, short one in front) under the carriage wheels and bolt the carriage to the base by means of two 4-1/2 nch long thumb screws, which are to be inserted through the mechanism base.
Frame Shipping nuts to tighten |
|
On 50's machine that played 50 records - 100 selections - there are three frame securing shipping nuts. Press down on the frame as you tighten them. If using a wrench do not over tighten - just enough that the frame feels solid in the cabinet. Don't bend stuff! |
|
After the 50's machines, there are four frame securing shipping nuts. Press down on the frame as you tighten them. If using a wrench do not over tighten - just enough that the frame feels solid in the cabinet. Don't bend stuff! |
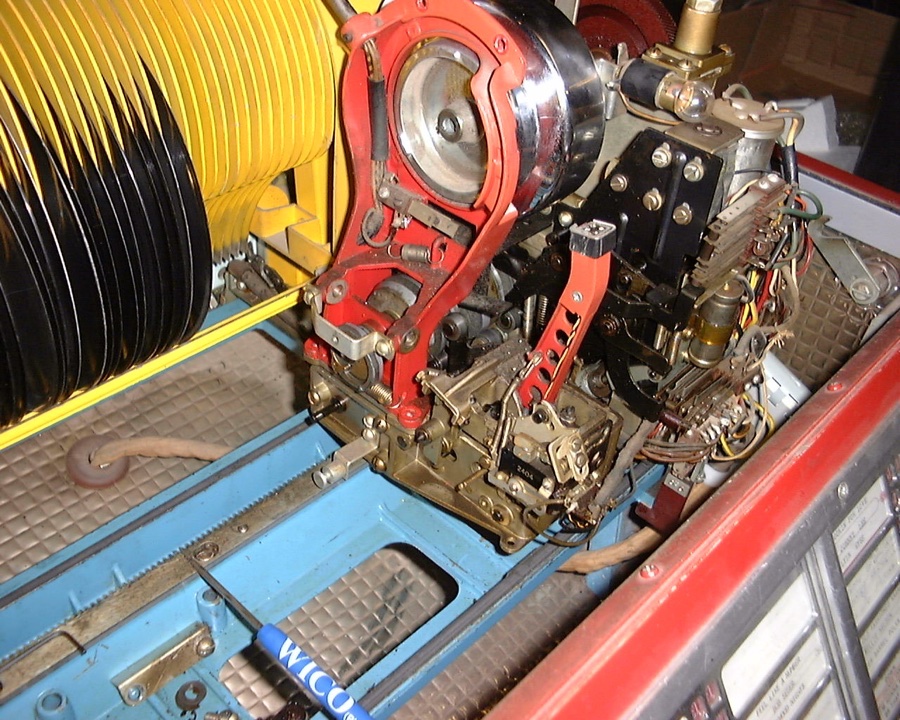
Securing the mechanism for rough or long shipments. |
|
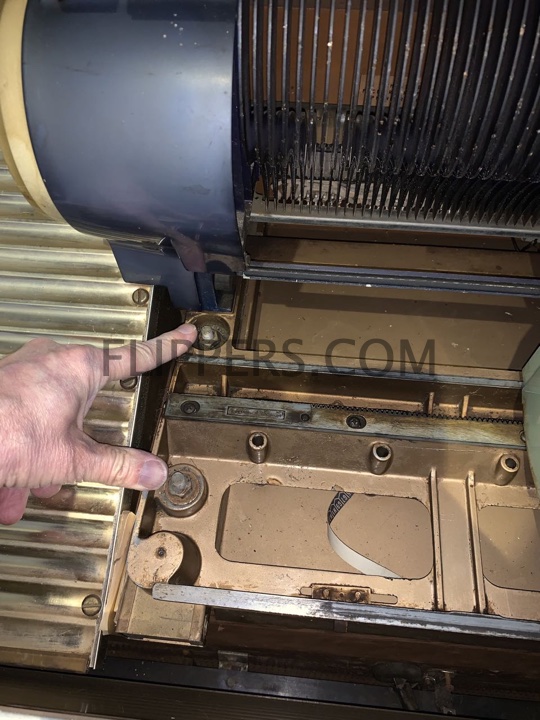
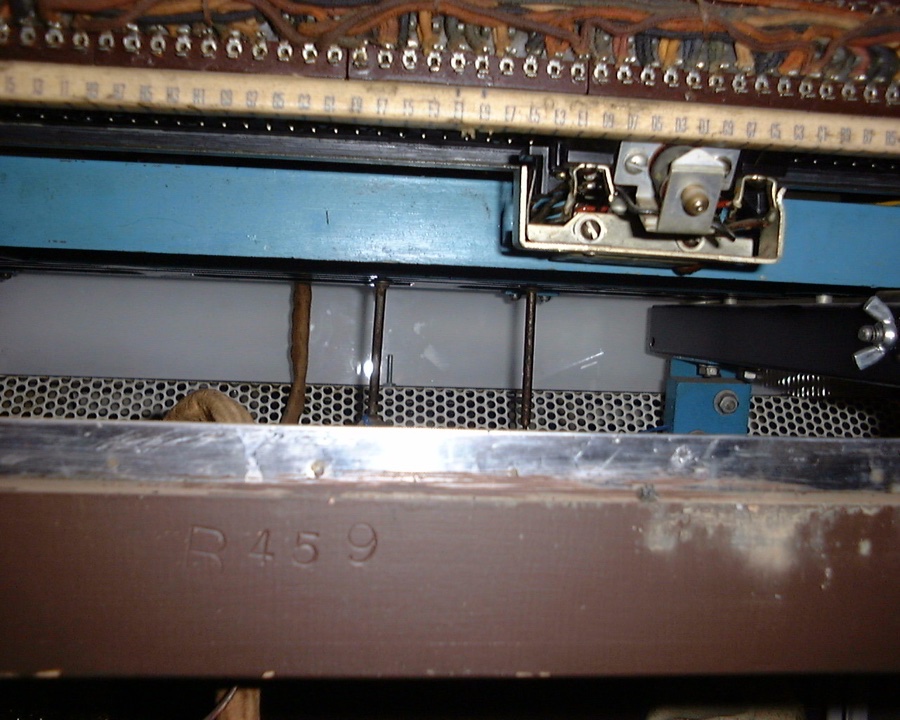
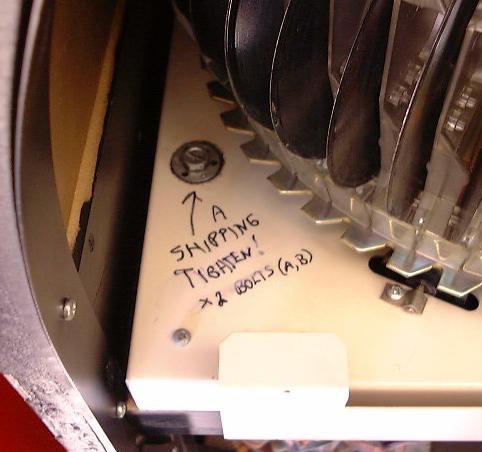
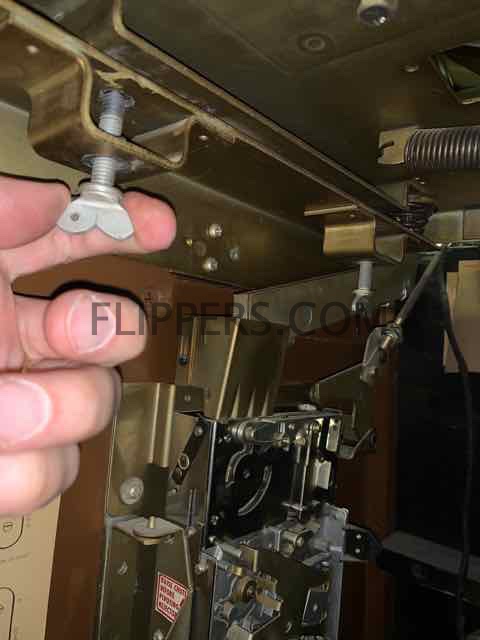
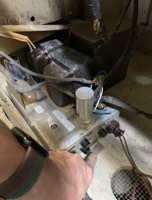
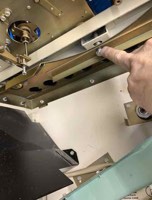
The WICO screw driver is over one of the two chassis securing bolt holes. You need to align the mechanism so the threaded holes on the underside are over these holes. A flashlight and mirror help...
Start with the mechanism at record selection D1 and see if it lines up there correctly. |
|
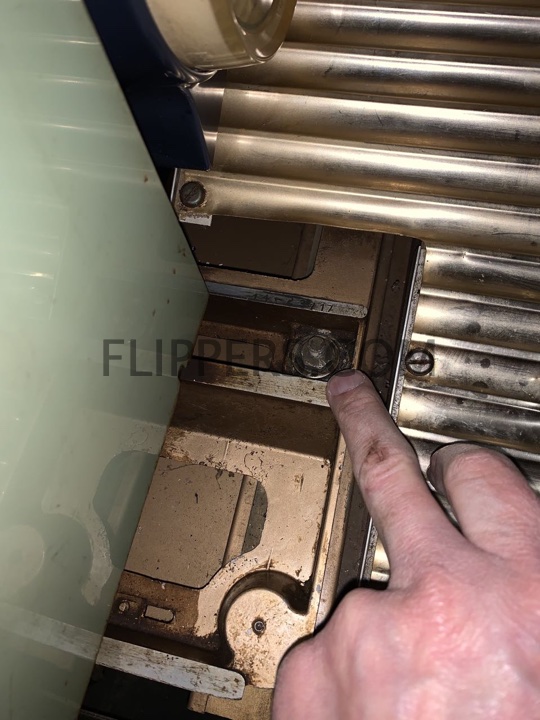
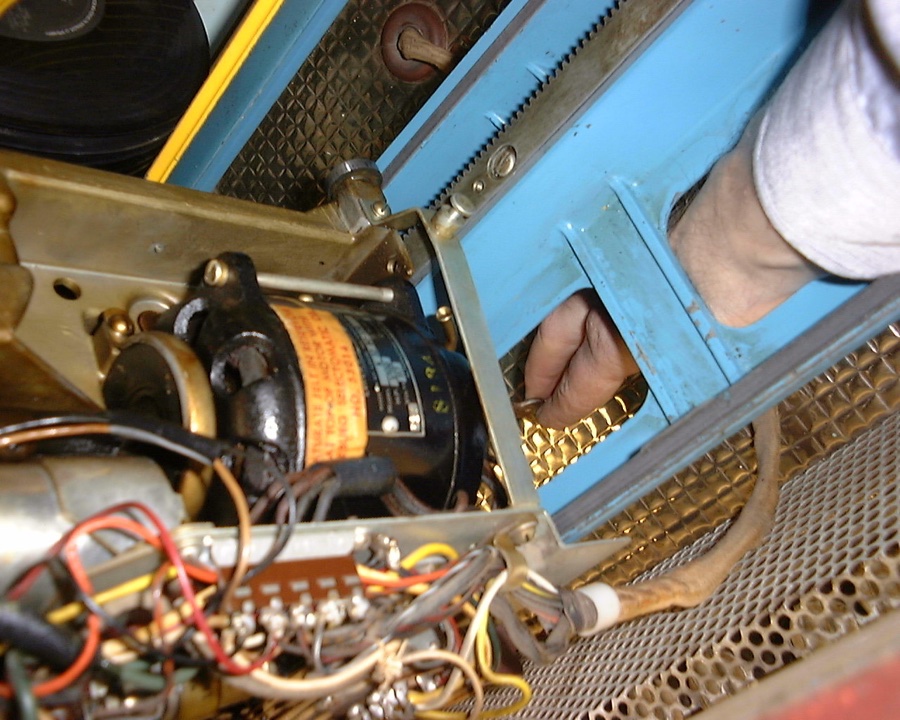
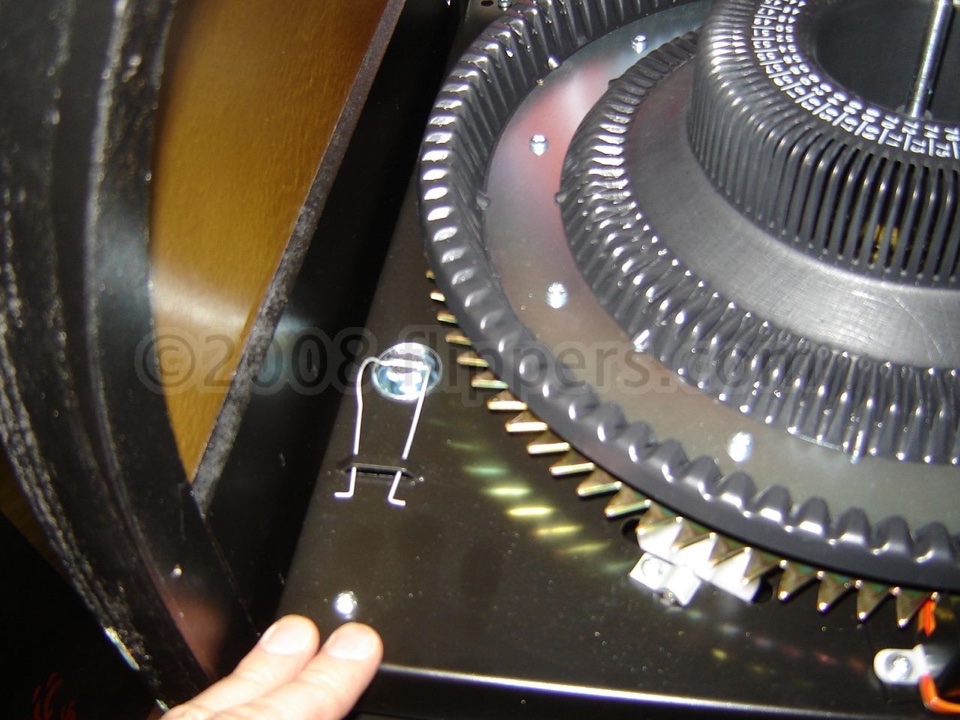
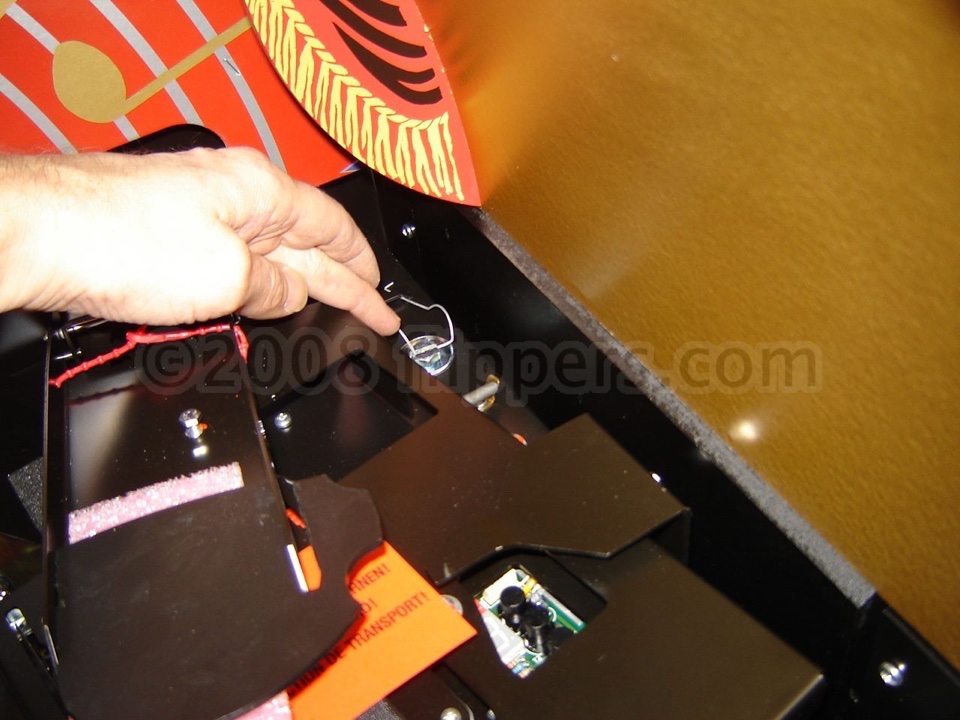
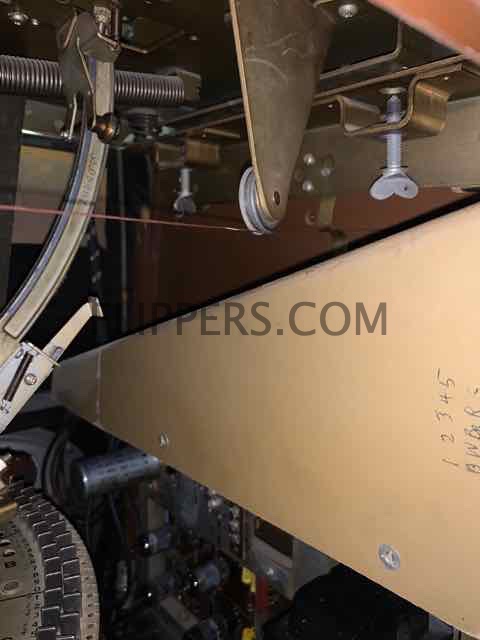
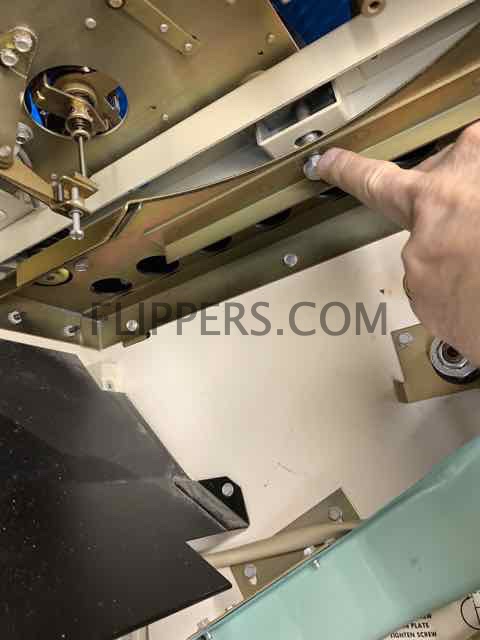
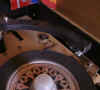
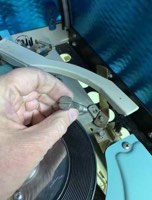
My hand here is tightening one of the two shipping bolts. The factory recommends felt pads under the carraige wheels. |
|
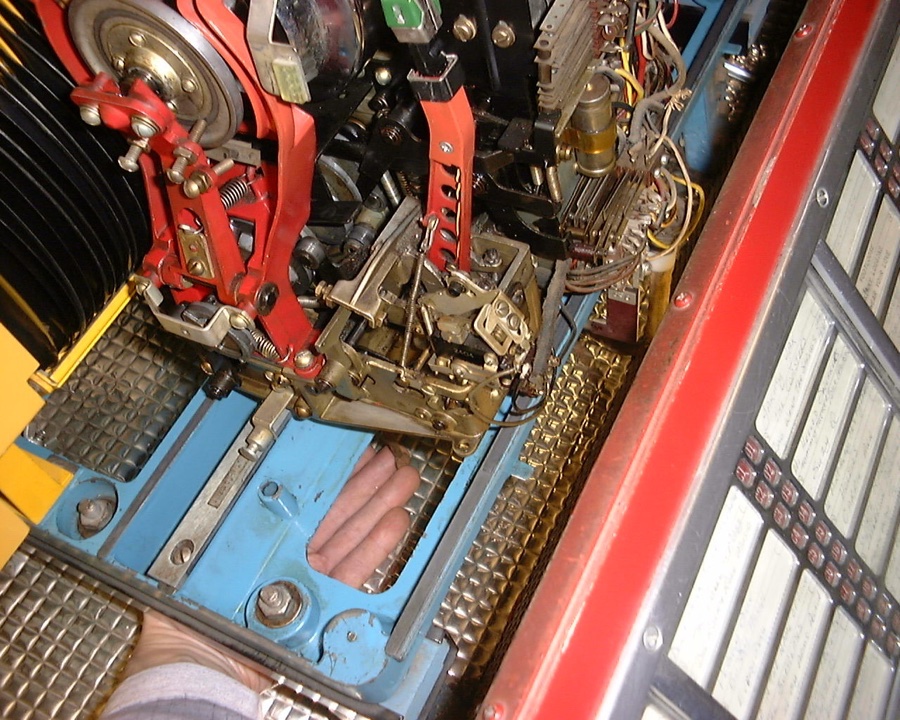
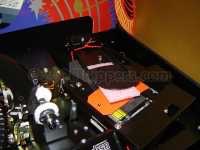
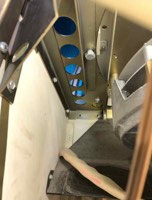
Here is the second bolt, note there is a third hole in the frame that you can use if the mechanism is more to the left.
Note the two nuts in the holes on the blue mechanism support frame? Those two and the others in similar holes on the other end of the frame are to be tightened to secure the frame to the cabinet. This is best done after the mechanism securing bolts are in place. You need to add wooden shims first prior to securing the mech frame bolts otherwise you may over-compress the support springs. (Thanks Ron for that tip!) |
|
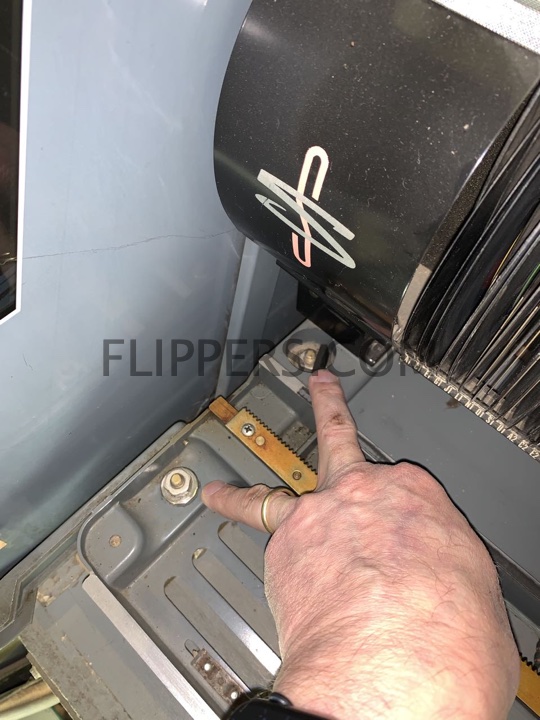
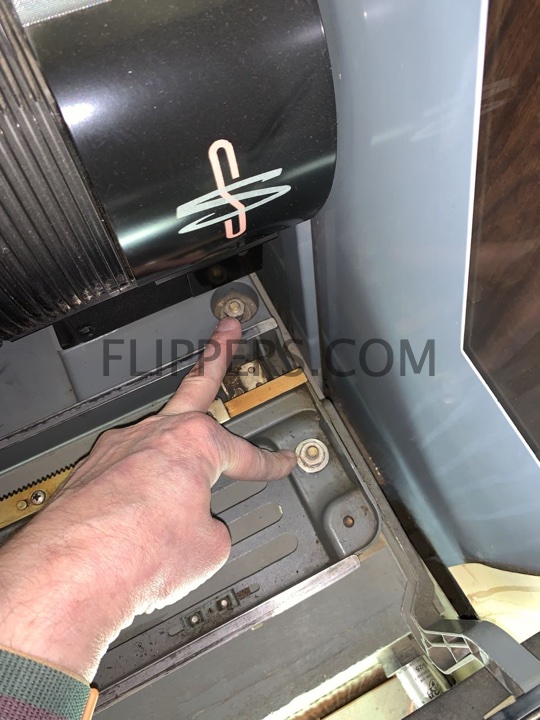
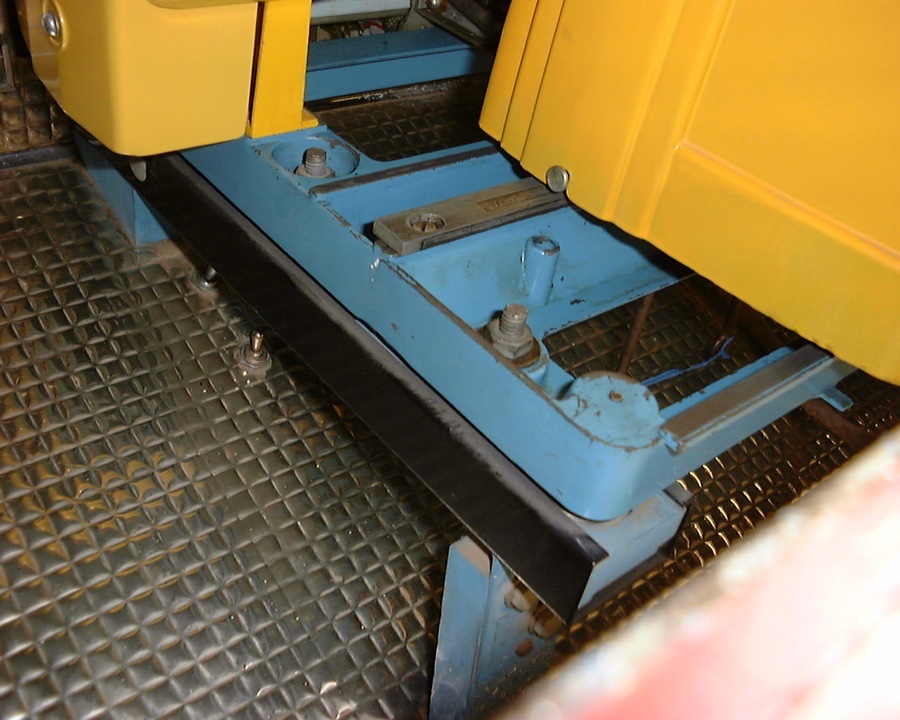
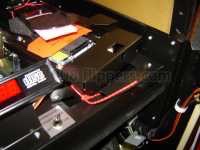
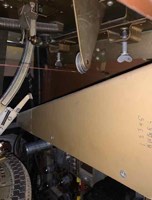
Second bolt with the mechanism cover back on. Place a 1/4" wedge of wood between the wooden sub-frame and the metal mechanism support frame by each securing bolt. |
|
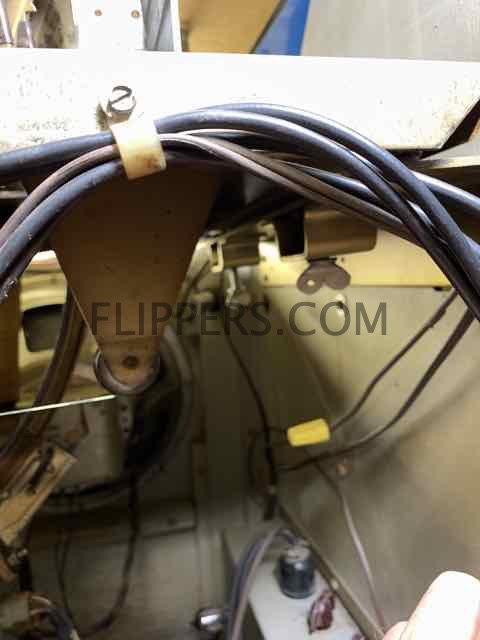
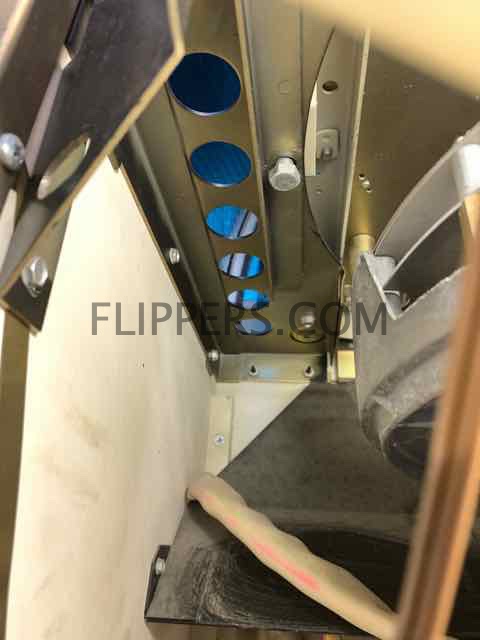
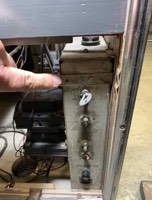
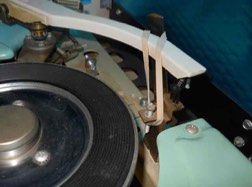
Rear view showing the two shipping bolts in place
Note the selector block is centered in the "U" clamp and the spring metal is pressed against the left side (viewed from rear) of the selection block. Check this after transport! |
|
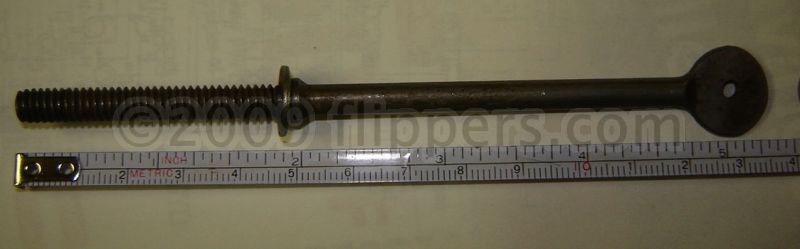
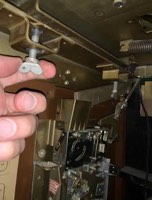
Shipping bolt make your own using 1/4" NC-20 rod stock, 5-1/2" total length (7-1/2 inch for later mechs), then use two nuts for the stop part, and a pair of wing nuts-back-to-back for the finger grab end. |
|
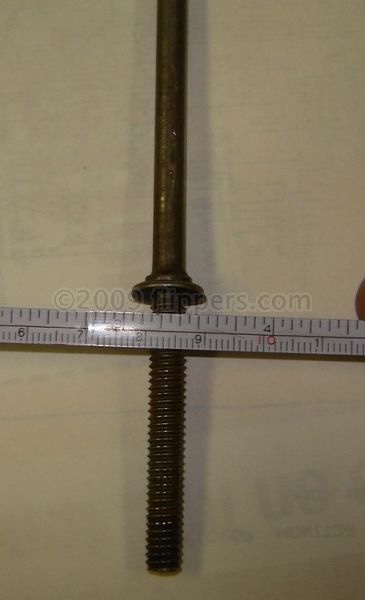
Another view of the bolt... |
Deutsche Wurlitzer Jukebox:
Shipping bolt locations for German Wurlitzer jukeboxes both 45 and CD |
OMT-CD
OMT-45
Shipping bolts may be ordered by clicking here...
|
OMT-CD
OMT-45
 |
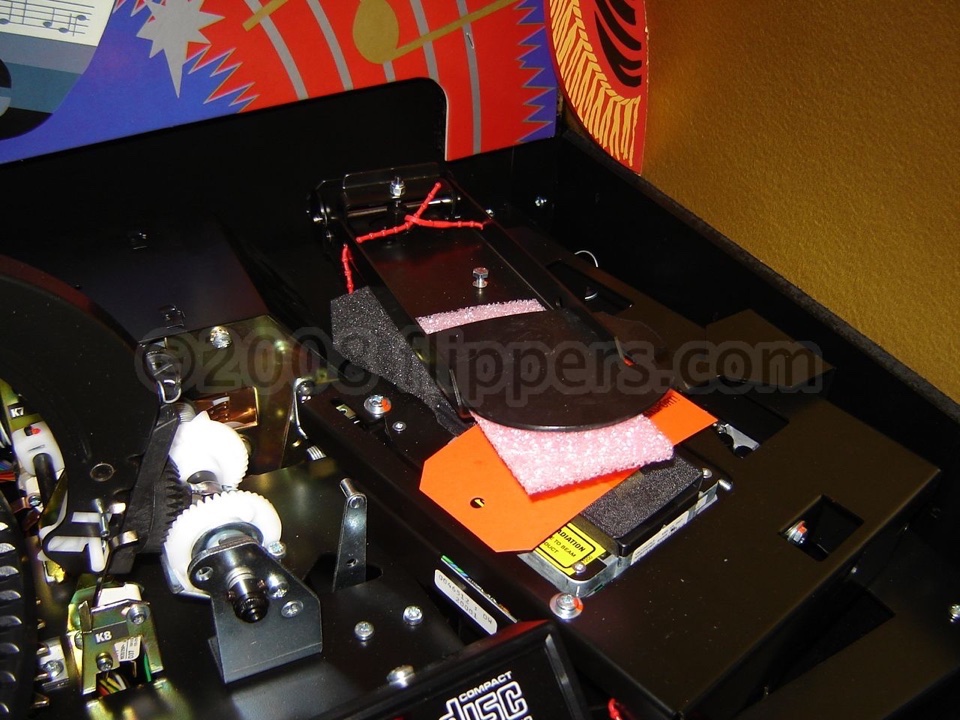
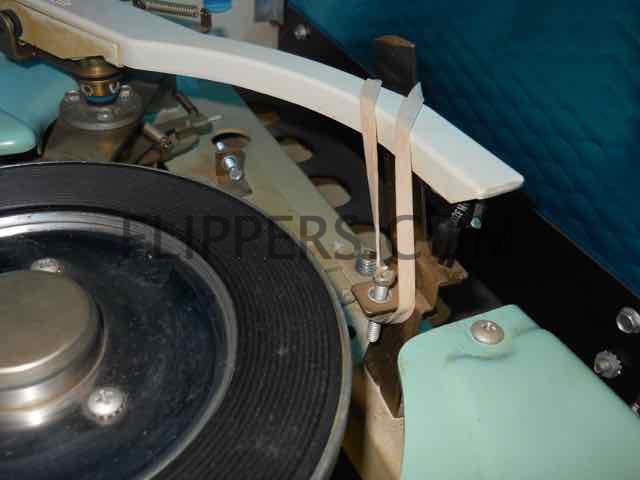
Tie down CD player and clamp arm so they can't flop around...note red strap placement and protective cover over CD-Player lens. |
You must take care of the bubble tubes primarily. Do try to have the machine on a small incline - lying on a sheet of plywood with a 2x4 at the top end to give it just a bit of lift. The idea is to keep the bubble tubes from sliding up and out of their heaters. The bubble tubes are pretty well secured but you must check they are seated once you reach your destination.
Do NOT take the door off unless you can’t fit it through a doorway any other way. The door is very heavy and easy to twist and drop when you are removing it. |
| Prepping Rockola Jukeboxes for shipping |
Rockola Nostalgia CD Bubblers use 3/8" machine bolts that are 3-1/2 inches long and a large flat washer to secure the mechanism. |
|
Preparing USA Made Wurlitzer jukeboxes for shipping
Preparing USA Made Wurlitzer jukeboxes for shipping
  |
Wurlitzer 2300
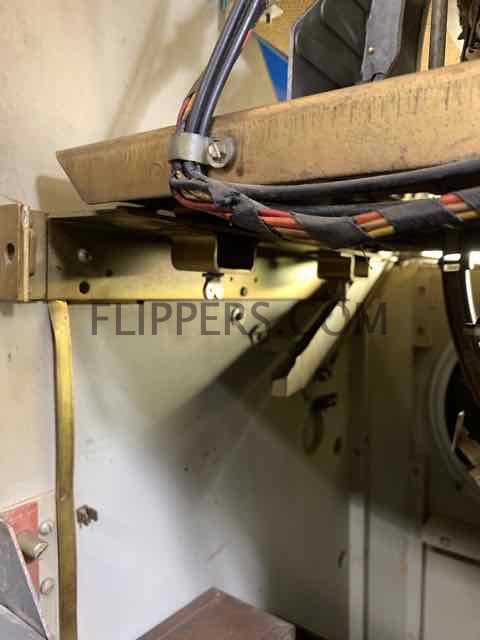
Left and right side (as seen from rear lower access) shipping bolts. Press down on chassis while tightening the bolts firmly finger tight. if shipping long distances then secure bolts with wire through holes provided. |
  |
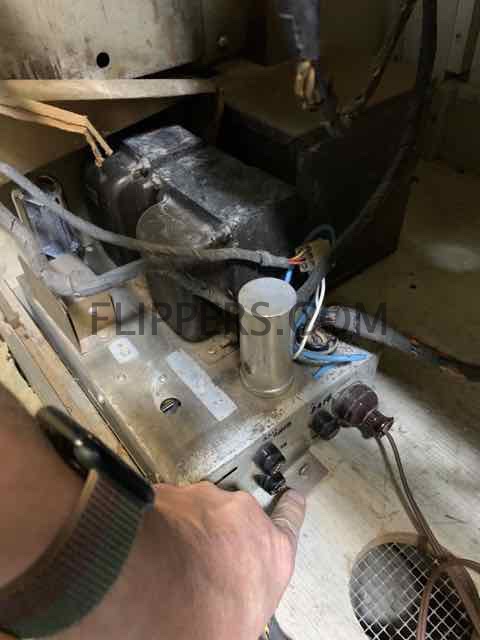
Be sure to secure the amplifier and power supply too! These should be secured on all models. |
| |
|
| |
|
  |
Wurlitzer 2600
Left and right side (as seen from rear lower access) shipping bolts. Press down on chassis while tightening the bolts firmly finger tight. if shipping long distances then secure bolts with wire through holes provided. |
| |
|
| |
|
| |
|
| |
|
    |
Wurlitzer 1050
Shipping bolts - two that are 3/8 x 1-3/4 inch - or a bit longer.
And secure tone arm as shown... |
(jrr-at-flippers-dot-com for those who do not have their browser set to open their email client)
Click here (spam@fl... is valid) to send us email-> 
Hablo espanol? Si! Email Alexander...
All information on this site is Copyright (©) by John's Jukes Ltd. 7 - 3979 Marine Way, Burnaby, BC, Canada V5J 5E3
(604)872-5757
|
|  Click here to order Parts