|
|
|||
| site search by freefind |
(If you don't see the Google Translate's "Select Language", then your browser is blocking google translate...so enable googleapis.com)
Atari Pinball Games - Upgrades &Troubleshooting- latest update
October 20, 2024
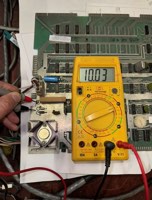
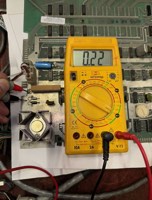
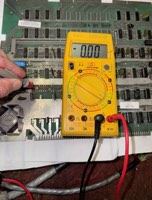
Take EXTREME care to only plug the Solenoid plug only into J8 on the MPU - if you plug it into J7 you WILL blow about fifteen ICs and need serious shop repairs (two hours at our shop). If that was the case then you have to replace all the Switch matrix TTL and a couple of others as well, I find you can often identify these with a Diode Check function on the digital meters. A normal gate is something like 0.500 to 0.800 volts relative to common, a bad gate is under 0.500... Please mark the Solenoid J8, and Switch J7 plugs and the circuit board clearly with coloured tape so no-one will easily mix them up! I can't stress this enough!!! If you take a zip-tie that has one of the screw down holes in it you can prevent the risk of plugging in P8 to J7 or J6 by adding the new zip-tie to the P8 cable in such a way that the plug can't possibly reach J7. I also recommend that you change the Solenoid Fuse in the power supply - at the very rear of the machine change Fuse F1(AA, ME, SR)/or F6(Atarians) Solenoids from a 15A Fast Blow (otherwised called a "Never-Blow") to a 5A Slo-Blo. The problem is the 15A Fast Blow fuse powers ALL the solenoids including the flippers so it needs to be replaced with a 5A Slo-Blo fuse. For Airborne Avenger (AA), Middle Earth (ME), Space Riders (SR) Time 2000 (T2K) the Solenoid fuse is F1, however the schematics for Atarians says the Solenoid Fuse is F6 - so check that game carefully to be sure that F6 is actually the solenoid fuse. Test MPU Voltages!
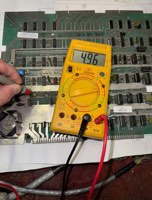
For verification of good logic power check the 5VDC board voltage - the 5VDC should not be lower than about 4.9VDC, and there should be 0.0VAC ripple on the 5VDC line - the resistor gets rather hot, be careful! Link to 205/220 adapter plug power wiring diagram for Series I games. Quick-connect lugs - they get loose! Solder the wires directly to the lugs as shown above. Another problem with late model Atari Pinball games (Hercules and Superman) is the factories use of a single sided printed circuit board for the Power Supply. (We won't talk about leaky batteries just yet) The common issue that develops over the years is fractures of the traces at the rear of the interconnect plugs (Molex) and the game then fails to work correctly. So a simple check on these machines is to remove the Power Supply board and resolder the pins Atari Power Supply Atari Power Supply lifted connector Atari Power Supply cracked traces - J4 in this case.
A friend contacted me recently (Jan. 2023) about a loud hum in the audio and dim displays in a customer's Superman game - after checking the above recommendations he found the solution as follows: The flat grounding cables had a long bolt which made it hard to really crank down on the nut so I found a fat metal spacer about 3/8" long and used that over the bolt to give me more room to tighten down the ground straps using a socket. I found one of the ground straps was loose on the MPU board. Once all that was tightened up the game worked fine. (Daina P.) The reason tightening the ground strapping fixed the problem is one or more of the Molex return/ground pins were damaged and the straps bypassed the bad connection. A good fix none the less! March 26, 2024: Customer in Ontario called - "Why is F7 (1A Slo-Blo) fuse blowing on a customer's Superman?" This fuse is for biasing the fluorescent displays. Hi Scotty, Atari replaced the rotary units with regular flipper assemblies and provided kits for operators to do this as the motors broke down. I have a few of these kits left (somewhat expensive) but you can often repair the motor assemblies with a bit of brazing or other repairs as required. What is your problem? Is something actually broken or is it weak? Weak is a problem with the mircoswitch (EOS) or the resistor or associated wiring to these two items. As I said earlier, broken parts can often be repaired - if you have a MAPP gas torch you can braze otherwise I would use a bit of silver solder and a regular propane torch. Silver solder is usually strong enough for this repair and you do not need to overhear the metal and risk ruining the strength of the metal - you just need to heat it up enough to melt the silver solder, way below red hot! John :-#)# |
(jrr-at-flippers-dot-com for those who do not have their browser set to open their email client) |
 Click here to order Parts

