|
 Click here to order Parts
|
|||
| site search by freefind |
(If you don't see the Google Translate's "Select Language", then your browser is blocking google translate...so enable googleapis.com)
Troubleshooting tips...
|
||||||||||||||||||||||||||||||||||||||||||||||||
The safest, reliable, way I know to remove the metal lift rail from a backglass is to let gravity do the job for you. All you need is a headboard, backglass you want to take the rail from, something soft (strip of foam) a second headboard or chair, and some time. Then follow the sequence below
To remove the glass, open the coin door, look on the inside of the door frame on the upper right for a bar/lever. Rotate the bar/lever to the left on an arc to the center of the door frame, this will release the lockdown bar (what you rest your hands on to play the game), lift this straight up, then the glass should slide towards you with a gentle pull. Note that due to drinks or other liquids having been spilled on the glass in the past the lockdown lever may by jammed. I have found that slow steady pressure applied over time works best. What I do is use a pair of 'Vise-Grip' pliers that are hooked to the latch lever, then tie a weight (a transformer weighing about ten pounds (4 kilo) is often enough) with a rope, and set the rope so it slides over the coin door and let the weight do the work. In about 1/2 hour you will find that the weight of the transformer allowed the gummed up lever to slowly open until it releases the ockdown bar. A rubber tie-down strap will also work fine. The point is to not apply excessive force or you will bend or break the lever assembly. Now you can slide the glass off, then remove and take the lockdown assembly apart and wash under hot water to free it up. If the glass is stuck, wet the edges of the glass and work it free from the side rails. Note that this is tempered glass and must be handled with great care as setting it on concrete can cause it to explode into thousands of chunks. |
|||||||||||||||||||||||
 Bally - Latched |
 Bally - Released |
 Gottlieb- Latched |
 Gottlieb- Released |
||||||||||||||||||||
 Stern - Latched |
 Stern - Released |
 Oh, and on Stern pinballs PLEASE bend the end of the support bar so it won't punch through the playfield!! |
 Williams - EM Latched |
||||||||||||||||||||
 Williams - 90's Latched |
 Williams - 90's Released |
 Williams - WPC Latched |
 Williams - WPC Released |
||||||||||||||||||||


Wide body games like Atari's Atarians, Middle Earth, Space Riders, etc. are easy to move, other than being heavy and wide.
The headboard comes off - there is a small access panel on the upper rear wall of the headboard, and the key should be (!) hanging inside the game on the coin door or inside cabinet wall(s). If it can't be found you can drill the lock out (assuming this is not one of our games, in which case the front door key may well open the rear access hatch) and then remove the little hatch and then inside there are two metal slides, pull them towards you (as seen from the rear) and then you can lift the backglass up and out (glass - be careful!!).
Next unplug the lights (cable may go inside the game to be unplugged from the transformer module - lift playfield up to access that plug), then remove the bolts holding the head to the cabinet, put the glass back in and now you only have to take the legs off. I recommend removing the game ball from the playfield - it will have rolled out of its storage spot when you lifted the playfield (see above for info on removing glass)
While playfield is up - use the TWO support bars, they fit in holes on the underside of the playfield - check for loose stuff in the cabinet (cashbox, manual, hammers, nails, children) and remove them to avoid banging stuff up.
Next, put a bar stool or similar item under the rear end of the pinball to raise the rear legs enough to remove them safely. Then with two people, set the body of the game down on the floor and tip it up, then remove the front legs.
Use a hand truck or humans to move game now.
Essential modification to Williams pinball games up to and including F14!
If you can solder there is a mod that MUST be done to Williams pinball games to avoid the risk
of a REAL FIRE in the game! If you can't solder then find someone who can...


It seems Williams made a mistake with the wiring on these games, the two bridge rectifiers
in the headboard are NOT fused between them and the transformer, thus if one of them shorts
out it can cause the power transformer to catch on fire or the wiring can burn...
Locate one wire on each bridge solder tab that is labeled "AC" (it doesn't matter
which "AC" you use, one per bridge) and cut the wire so that a fuse holder can be
placed in-line. Then get two 8A Slo_blo (MDL) fuses to go into each of the two fuse holders.
You only need one (1) fuse per bridge rectifier.
A neat pin moving device
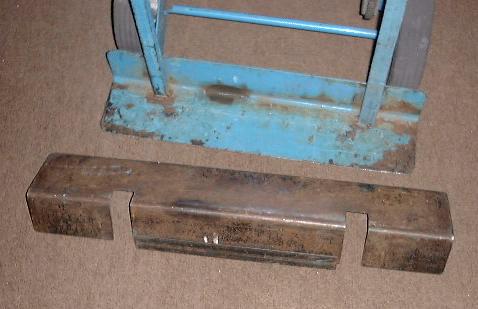
Take look at these pictures on a very easy way to move pinball games, you just need a friend with a welding experience, or ask us to make you one...

Here is another shot of the pin moving modification to a fridge dolly.
Here is the device removed from the dolly.
Here is a closeup of the device.
Substituting Stern <--> Bally 7 digit displays I was asked the question for using Bally 7 digit in a Stern game, the solution is easy, just short pins number 11 & 12 on the 7 digit display, this will allow you to use it in either game...
A way to check electrical transformers for shorts internally or on outputs. (from the newsgroup rec.games.pinball)
"On 15 May 1998 12:39:52 GMT, XXXXXX@aol.com wrote:"
"Mark, Thanks for the info, I will give it a try. Sounds like I need a hand full of fuses!!!!!!!
Scott"
Hi Scott!
Do NOT try servicing a machine with "A hand full of fuses"!
That is a fairly good way to blow a transformer or worse. Better way to go is to replace the fuse with a small wattage 115 volt bulb. Use a 25 watt bulb for this application. Now, remove the power supply plug and unplug ALL the displays. Hook the light bulb across the fuse holder, then turn on the game. Light bulb should glow, but not a full intensity. If dim that's good. Next turn game off, hook up power supply, BUT disconnect other cables from the power supply (right side and top cables), plug in again, light should be NO brighter. Might be briefly lit, but will dim down almost immediatly.
Now turn game off again, plug in half the displays, test, turn off and plug in other half, test. If the bulb glows brighter at any point (and I do mean BRIGHTER) then you have found the area and just disconnect/connect things until you find the guilty party. You can, if the lamp test passes all the displays and the unloaded power supply, then connect up the right cable (not the top) and test again. If bright with all displays connected remove half and test ... Lastly try the MPU board, but by now you should have found the short.
This will work for both transformers, but you might try removing the fuses from the front fuse panel and test after replacing each one. The test process depends on the problem.
Oh, and if the lamp is bright with nothing connected to the transformer, it is probably bad, but make sure all circuits from the transformer are disconnected, including bridge rectifiers.
This test process also works great for solid state amplifiers and monitors...
John :-#)# ps, this time I'll put a copy of this on my site...
Here is a link to a radio restoration guy who made his version of the series lamp tester (this is a very old idea by the way). the only suggestion I have is to use a three wire power cord to make it safer.
Updated 2011:
If you are blowing fuses during testing phases (such as shorted lamp buss) you need to look into the "Light Bulb in Series Test" (LBST) fixture.
I made up a special test power system box with the hot side of the line cord (black wire) going to a power switch, then a fuse, and then the lamp (center terminal of lamp) and outer terminal of lamp then goes to the hot side of the AC socket (narrower opening). The return (white) line of the power cord goes to the cold/neutral side of the AC socket (wider opening). Power cord ground (green) to ground pin on AC socket.
Take great care to make this device as safe as you can!
Now take a regular 75 - 100 W incandescent (NOT compact flourescent!) and screw it in the lamp socket then plug the game under test's AC power cord into the AC socket of the LBST fixture.
If there is a short the lamp will glow brightly however you won't blow any fuses! Nor will the light bulb allow enough current to flow to damage the transformer or the shorted circuit...
I just tried it on a Bally TIME ZONE (Nov, 2011). With the 100W light in series with the line power the coin door would light up (100W bulb was very very dim), then when I pressed the left flipper switch to activate the hold coil the 100W lamp came up about 1/2 bright. Game lite up somewhat dimmer than normal, but all lights came on and hold relay held in. Now I tried shorting a coin door light bulb out. The 100W bulb glowed brightly and the playfield lights went quite dim - but not extinguished! So now I could tell very quickly where the short was (duhhh!) but it works for games where you DON'T know where the short it.
Try it...
I use this simple test on many devices - great for checking audio amps that have just been rebuilt - if the lamp glows brightly momentarily then falls off to a dim glow then the amp is probably OK (no shorts or devices drawing excessive current).
Remember this is dealing with 115VAC (or higher) and treat it with a great deal of respect. You are on your own with this idea. I (John Robertson or Flippers.com or John's Jukes Ltd.) assume no responsibility for damage or shock hazard due to this circuit suggestion.
You are really on your own here as far as safety is concerned!!!!!
Weak flippers?
If you have the OPTO ISOLATOR style of flipper cabinet switches (Twilight Zone, STNG, and many others) then you often only need to clean them with either a "Q-Tip" or cloth - make sure either is DRY!


Before... Clean top... Then the bottom...GENTLE!!!
Problem:
Flipper coil overheats
To get back to the original question...I have had NEW EOS switches that are internally SHORTED! Weird, they would open just fine, but the coil would melt down in a week or two.
Now I recommend that folks take a look at the EOS and when the coil is activated watch for a spark! There should be one very couple of flips, even if the capacitor is good...or check the coil with a meter, read across the two outside lugs, then manually push the flipper plunger inside the coil until the EOS opens, and check again, the resistance should be substantially higher..
Dealing with contact resistance.
In article .............,  areizman@aol.com (AReizman) wrote:
) There is no technique I know of to restore the Bally bayonet sockets.
)The solder tin on the lamp base contact wears off and cannot be easily
)restored.
)   The only sure fire fix I know of is to replace the bayonet bulbs and
)sockets with the wedge base 555 bulbs.

Hi
 There are two things you can do. The problem is usually
that the spring has corroded against the housing. One
method that works reasonably well is to solder a wire
from the center post to the solder tab.
 The method I like best is a little different. Go to
an auto parts store ( like Kregan's ) and buy a tube
of silicone grease ( brand I use is Sil-Glyde ). This
is not the stuff used for heat sink grease, that won't
work. Squirt some grease into the socket and put the lamp
into it. You need enough to come out the back. Take
a pair of needle nose pliers and rotate the center pin,
while the lamp is in the socket,
from the back a little. Turn thing on and it should
work. You may need to wiggle the bulb a little more
until the lamp doesn't go on and off anymore. The grease
will keep the corrosion from causing more problems
and help to remove heat from the bulb, making it last
longer. Wipe up any excess grease and try to keep it
off the play field. It won't do any serious damage, after
all, most waxes have some silicone oils to give luster
but the stuff is messy. There is no real solvent for the
stuff but the oil will eventually evaporate.
 By the way, NASA uses silicone grease on the connectors
on the shuttle so it isn't all that unusual. Petroleum
grease will not work either because it has to high
of a film strength ( remember that these are intended
as lubricants ).
Dwight_k_elvey@my-deja.com
Lubrication of Electromechanical Pinballs and other games:
My experience with these stepup units (over 25 years of repairing pinballs) is that they SHOULD be lubricated. A good grade of oil - Sewing Machine, Bicycle, or even 3-in1 is required to make sure the pivots do not wear out over time. They require re-oiling about every ten years in normal home use.
The contact wipers should be coated with a very light grease-a thin film-this grease is called 'Electrical Grease' and again, it will reduce wear on the contact pins/wipers.
I have seen many units with badly worn parts due to poor or no lubrication.
Do NOT use grease on the wipers on the Printed Circuit type of wiper contact boards used on Stern Pinballs-this will cause shorting out between the copper printed surfaces on the fibre glass PCBs used in the early to mid 70's on their last EM pinballs. These must be dry, but still the rockers need oil.
Do NOT lubricate plungers with anything other than graphite powder in any circumstances!
(Click here to get a tutorial on finding techsupport using archived postings in rec.games.pinball and rec.games.video.collecting, etc. newsgroups)
Hi XXXX!
Sorry, but due to lack of time I can not help folks technical questions in private email. Please post your questions to the newsgroups rec.games.pinball for the (eg..)Gottlieb problem, and rec.games.video.arcade.collecting for the (eg..)Space Duel problem. You can also do a search in for both games (eg.. for the Gottlieb problem do a search for "Gottlieb" "Tech" "System I" or "System 80") and you should find most of your questions answered... Try the historical archive there as well, a LOT of repairs tips are there.
You shall probably find that I or others will help in the newsgroups as that is a public forum and we like to help as many as possible...
John :-#)#
(jrr-at-flippers-dot-com for those who do not have their browser set to open their email client) |
